How to Grow Cauliflower Successfully and Enjoy Fresh Harvests from Your Home Garden
Published on
September 22, 2025
Author
Anjali Sharma
Anjali was born and raised in Indi and is now residing in New Jersey with her husband. Anjali's passion lies in raising her own vegetables and herbs, which she wants to share with others.
Growing Bell Peppers Q&A
Are peppers easy to grow for beginners?
Yes, sweet bell peppers are generally easy to grow as long as you wait until the weather is thoroughly warm before planting them outside. Providing consistent water and full sun does most of the heavy lifting.
Do I need to wear gloves when handling sweet bell peppers?
No. While handling hot peppers requires care (and often gloves) to avoid burning your skin or eyes with capsaicin, sweet bell peppers have zero heat and are perfectly safe to handle bare-handed.
Can I grow a bell pepper from a scrap from my kitchen?
While you can technically harvest seeds from a store-bought pepper scrap, it is not recommended. Grocery store peppers are often hybrids, meaning their seeds will not grow true to the parent plant, and they may be treated to prevent germination. It is always better to buy dedicated pepper seed.
Garden Styles Q&A
How do I find my garden style?
To find your garden style, gather garden design ideas that match your personal taste and outdoor space. Whether you work alone or hire a landscape architect or garden designer for your project, find the perfect fit by looking at various styles. You might prefer the clean lines of a modern garden or the meandering paths of a Japanese garden style.
What is the best design style for a small garden or apartment?
For an apartment, small garden, or urban garden, container gardening is your best friend. A courtyard or city garden setup looks great with the sleek lines and hardscape of contemporary gardens. You can also create a mini Mediterranean garden with fragrant herbs like rosemary in pots, or a compact tropical gardens layout with bold tropical plants.
How do I choose the right plants for my landscape?
Choosing the right plants makes your garden complete. For a low-maintenance landscape, rely on native plants and drought-tolerant plants. Always match the planting to your design style: use Japanese maples and bonsai trees for a Japanese garden, a neat shrub or hedge for a formal garden style, and wildflowers or grass for a naturalistic space.
Backyard Garden Ideas Q&A
What is the easiest backyard garden for beginners?
Container gardening and raised bed vegetable gardens are the easiest for beginners. Containers allow you to control the soil and move plants to find the best light, while raised beds prevent weeds and soil compaction, making maintenance much simpler.
How do I start a backyard garden with no experience?
Start small. Choose a small outdoor space or a few pots on a patio. Pick 3 to 5 easy-to-grow plants (like basil, cherry tomatoes, or marigolds), buy high-quality potting soil, and place them in an area that gets good sunlight. Observe them daily to learn their watering needs.
What vegetables grow best in a backyard garden?
For most backyard spaces, tomatoes, zucchini, radishes, lettuce, and bush beans are excellent, high-yield choices. If you have a very small backyard, opt for vertical growers like climbing peas or pole beans.
How much does it cost to start a backyard garden?
You can start a simple backyard container garden for under $50 by purchasing a few pots, soil, and seeds. Building raised beds or implementing full backyard landscaping ideas on a budget might cost between $150 to $500, depending on the materials used (like reclaimed wood vs. cedar).
Do backyard gardens need full sun?
Not necessarily! While vegetable gardens and drought-tolerant Mediterranean setups require full sun (6+ hours), you can easily create a beautiful shade garden using ferns, hostas, and astilbes in low-light outdoor areas.
How often should I water backyard plants?
This depends heavily on your garden type and climate. Container gardens and raised beds may need daily watering during peak summer heat. In-ground drought-tolerant shrubs might only need watering once every few weeks. A general rule is to water deeply when the top 1-2 inches of soil feel dry.
Can I grow a garden in a small backyard?
Absolutely. Small backyard ideas like vertical gardens, hanging baskets, and compact container gardening allow you to transform even the tiniest balcony or narrow side yard into a lush outdoor oasis.
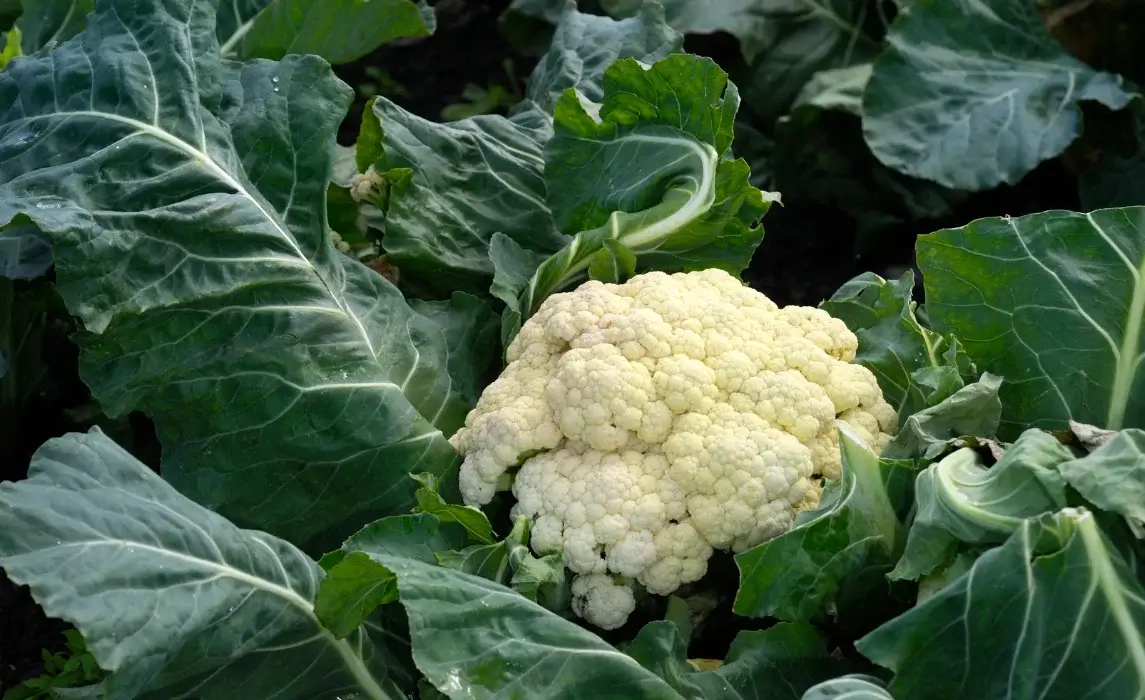
Cauliflower is a cool-season vegetable that rewards patient gardeners with dense, flavorful heads that can be used in everything from hearty roasts to light, nutritious salads. While it belongs to the same family as broccoli, cabbage, kale, and Brussels sprouts, cauliflower can be a bit more finicky to grow. With the right conditions, such as cool temperatures, fertile soil, and consistent care, you can enjoy a bountiful harvest straight from your own backyard. This guide will walk you through everything you need to know to grow cauliflower successfully, from planting seeds to protecting your crop, so you can enjoy fresh, homegrown produce right at your table.
Plant Attribute
Details
Plant Name
Cauliflower (Brassica oleracea var. botrytis)
Plant Type
Annual, cool-season vegetable
Size
12–30 inches tall, 18–24 inches wide
Soil Type
Fertile, well-draining loam enriched with organic matter
Soil pH
6.0–7.0 (slightly acidic to neutral)
Bloom Time
Does not bloom in cultivation; grown for edible heads (curds)
Hardiness Zones
USDA 2–11 (grown as a seasonal cool-weather crop)
Native Area
Mediterranean region
Toxicity Level
Non-toxic (safe for humans and pets)
How to Plant Cauliflower (Beginner-Friendly)
Starting from Seeds
Begin indoors – Use small seed trays or pots filled with light, fluffy seed-starting mix (not heavy garden soil).
Plant the seeds – Place them about ¼–½ inch deep, then lightly cover with soil. Don’t bury them too deep.
Keep them warm – Cauliflower seeds like it around 70°F (21°C). They should start sprouting within 5–10 days.
Thin them out – Once they sprout, keep only one strong seedling per cell or pot. Snip the weaker ones with scissors at soil level.
Get them ready for outside – Before planting outdoors, put the seedlings outside for a few hours each day. Do this for 5–7 days, adding more time daily. This “hardening off” prevents shock.
Starting from Seedlings
Pick healthy plants – Look for seedlings with 4–6 strong leaves. Avoid plants that look yellow, weak, or root-bound.
Prepare the soil – About 2–3 weeks before planting, mix compost or old, well-rotted manure into your garden bed. Cauliflower loves rich soil.
Make space – Dig holes 18–24 inches apart in rows that are 24–30 inches apart. This gives each plant room to grow.
Plant them in – Place each seedling in the hole at the same depth it was growing in its pot. Don’t bury the stem too deep.
Tuck them in – Gently press soil around the roots, then water well to help them settle.
Requirements for Growing Cauliflower
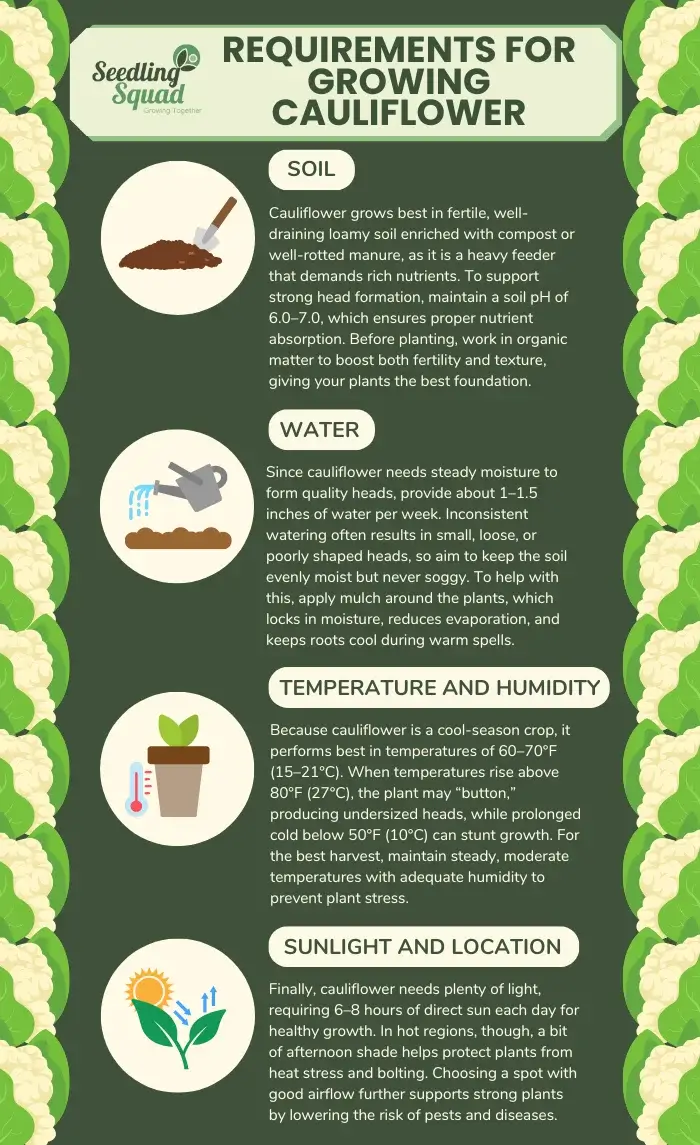
Soil
Cauliflower thrives best in fertile, well-draining loamy soil that has been enriched with plenty of organic matter such as compost or well-rotted manure. The soil should be rich in nutrients to support the plant’s heavy feeding needs throughout its growth cycle. Maintaining a soil pH level between 6.0 and 7.0 is ideal, as this range allows for optimal nutrient absorption, ensuring strong growth and healthy head formation. Before planting, it’s recommended to prepare the soil by working in organic material to improve both fertility and texture.
Water
Consistent watering is crucial when growing cauliflower. The plant requires about 1 to 1.5 inches of water per week, and the soil should be kept evenly moist but never soggy. Irregular watering can stress the plant and result in poor-quality heads, sometimes causing them to become small, loose, or even fail to form properly. A layer of mulch around the plants can help retain soil moisture, reduce evaporation, and keep roots cool, which is especially important during warm weather.
Temperature & Humidity
Cauliflower is a cool-season crop, performing best when temperatures range between 60–70°F (15–21°C). Temperatures that climb above 80°F (27°C) can cause “buttoning,” where the plant produces tiny, undeveloped heads instead of full, compact ones. On the other hand, exposure to temperatures below 50°F (10°C) for extended periods may stunt growth and prevent heads from maturing. Maintaining steady, moderate temperatures and adequate humidity is essential to avoid stress and achieve a high-quality harvest.
Sunlight & Location
Cauliflower requires plenty of sunlight to grow properly, needing at least 6 to 8 hours of direct sun each day. Planting in a location with full sun exposure ensures strong, healthy plants and well-developed heads. However, in regions with very hot climates, providing some afternoon shade can help protect the plants from heat stress, which may otherwise lead to bolting or poor head formation. Choosing a location with good airflow also helps reduce the risk of pests and diseases.
Maintenance Tips for Growing Cauliflower
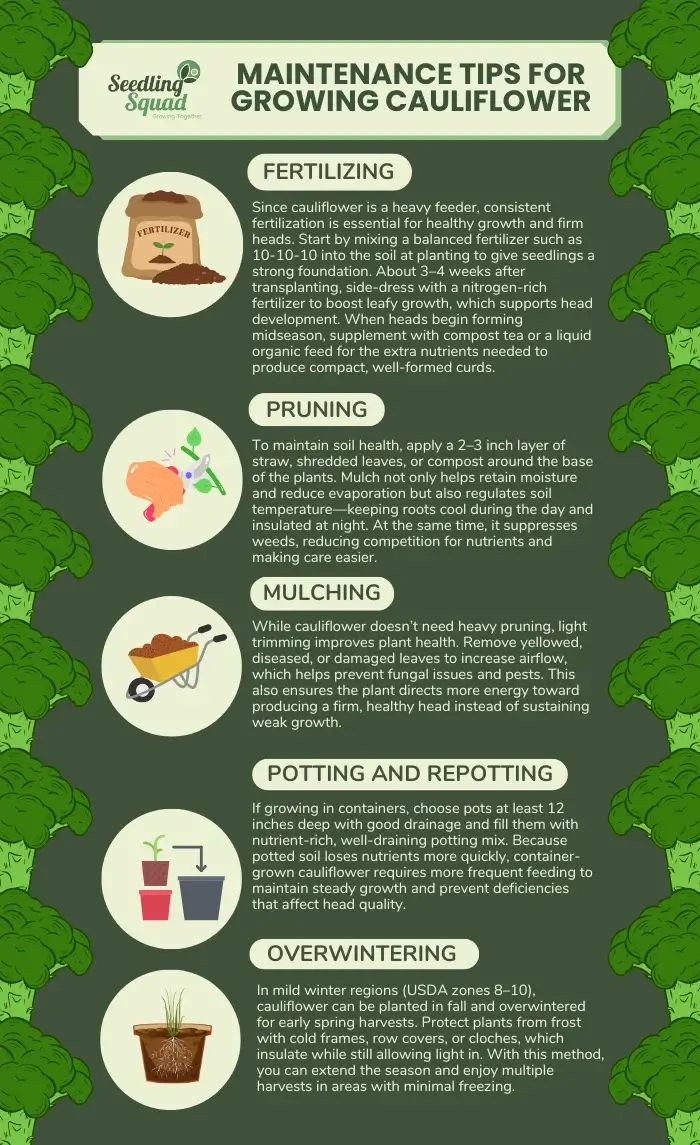
Fertilizing
Cauliflower is a heavy feeder, so consistent fertilization is key to healthy growth and large, firm heads. At planting time, mix a balanced fertilizer such as 10-10-10 into the soil to give the young plants a strong start. As the plants grow, side-dress with a nitrogen-rich fertilizer about 3–4 weeks after transplanting to encourage vigorous leaf development, which is essential for supporting head formation. When the heads begin to form midseason, supplement with compost tea or a liquid organic feed to provide an extra boost of nutrients that will promote compact, well-formed curds.
Mulching
Applying mulch around cauliflower plants is highly beneficial for both soil and plant health. Spread a 2–3 inch layer of straw, shredded leaves, or compost around the base of the plants to help retain soil moisture and reduce evaporation. Mulch also helps regulate soil temperature, keeping roots cool during warmer days and insulating them during cooler nights. Additionally, it acts as a natural barrier against weeds, minimizing competition for nutrients and making maintenance easier.
Pruning
Unlike some vegetables, cauliflower does not require heavy pruning. However, occasional light pruning can help keep plants healthy. Removing yellowed, diseased, or damaged leaves improves airflow around the plant, which reduces the risk of fungal diseases and pests. Keeping the foliage tidy also helps ensure that more of the plant’s energy is directed toward developing a firm, healthy head rather than sustaining unnecessary or unhealthy growth.
Potting & Repotting
Cauliflower can successfully be grown in containers as long as the pots are at least 12 inches deep to accommodate the root system. Use a nutrient-rich potting mix that drains well, and ensure the container has proper drainage holes. Because nutrients leach out of potting soil more quickly than in-ground soil, container-grown cauliflower requires more frequent fertilization. Regular feeding will help sustain vigorous growth and prevent nutrient deficiencies that can compromise head quality.
Overwintering
In regions with mild winters, particularly in USDA zones 8–10, cauliflower can be planted in the fall and overwintered for an early spring harvest. To protect the plants from frost damage, use cold frames, row covers, or cloches, which provide insulation while still allowing light to reach the plants. Overwintering can extend the growing season and make it possible to enjoy multiple harvests in areas where extreme cold is not an issue.
Discover how to grow your own food, build resilience, and find hope through gardening in uncertain times.
Common Pests and Diseases Pests
Pests
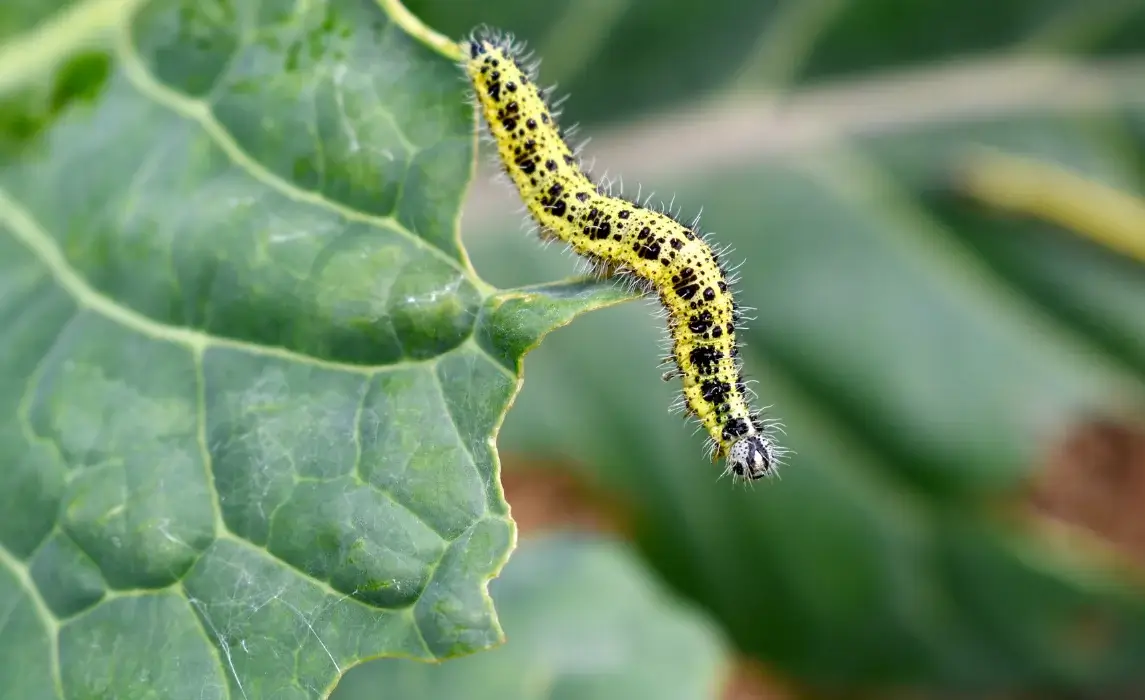
Cabbage Worms: These green caterpillars are the larvae of cabbage white butterflies. They chew irregular holes in leaves and can quickly damage cauliflower heads if not controlled. Use row covers to prevent adult butterflies from laying eggs or apply Bacillus thuringiensis (Bt), an organic treatment safe for beneficial insects.
Aphids: Tiny, soft-bodied insects that cluster on the undersides of leaves, sucking sap and causing leaves to curl or yellow. They also secrete honeydew, which can attract sooty mold. A strong spray of water can knock them off, or you can treat infestations with neem oil or insecticidal soap.
Flea Beetles: Small, jumping beetles that leave “shot-hole” patterns in leaves, which can stunt growth in young plants. Use yellow sticky traps to monitor infestations, apply diatomaceous earth around the base of plants, and consider floating row covers to protect seedlings.
Diseases
Clubroot: A persistent soil-borne fungus that causes roots to become swollen and distorted, leading to stunted and wilted plants. To manage it, rotate crops regularly, avoid planting brassicas in infected soil, and lime acidic soil to reduce fungal spread.
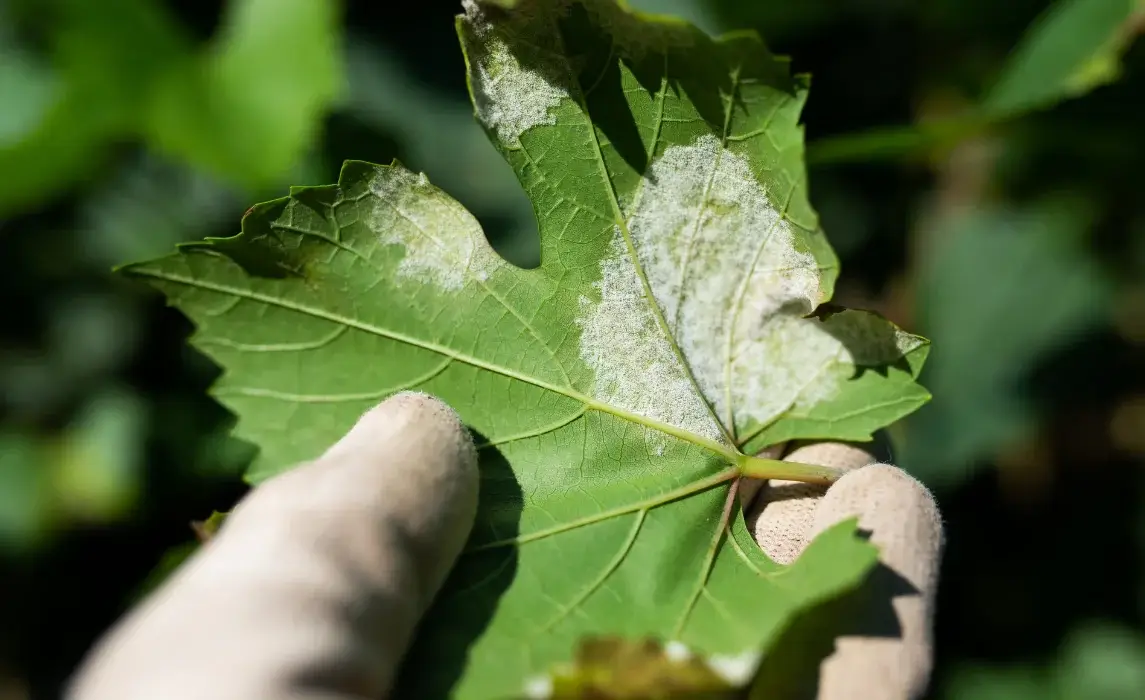
Downy Mildew: Appears as yellow patches on upper leaf surfaces, with fuzzy gray or white mold underneath. It thrives in cool, damp conditions. Prevent it by ensuring good airflow between plants, watering at the base, and using fungicidal sprays if needed.
Black Rot: A bacterial disease that causes yellowing leaves with V-shaped brown lesions pointing inward from the edges. It spreads quickly in warm, wet conditions. Avoid overhead watering, sanitize tools, and promptly remove any infected plants to stop the spread.
Discover beginner-friendly vegetables and simple gardening tips to help you start a productive and thriving garden.
Harvesting and Storing Cauliflower
Harvest cauliflower when the heads are 6–8 inches across, compact, and firm, using a sharp knife to cut them while leaving several leaves attached for protection; avoid delaying harvest as overripe heads become loose, bitter, and discolored. For storage, keep fresh heads in a perforated bag in the refrigerator for up to a week, blanch florets for three minutes before freezing them in airtight containers, or preserve them longer by pickling in a vinegar brine.
Frequently Asked Questions:
Q: What are the ideal growing conditions for cauliflower?
A: Cauliflower grows best in cool weather with temperatures between 60–70°F. It prefers a garden bed with fertile, well-drained soil, a pH of 6.0–7.0, and consistent moisture. Because cauliflower is more sensitive than other vegetable plants, it struggles in the heat of summer and thrives in spring and fall.
Q: Is cauliflower difficult to grow compared to other vegetables?
A: Yes, cauliflower is considered one of the more difficult to grow garden vegetables. Unlike broccoli and cauliflower’s other Brassica relatives, cauliflower is more sensitive to temperature swings, soil fertility, and watering. With careful timing and steady care, though, you can get excellent results.
Q: When should I start cauliflower seeds?
A: For a spring harvest, start cauliflower seeds indoors 4–6 weeks before the last expected frost. For a fall harvest, start cauliflower 6–8 weeks before the first fall frost date. Cauliflower is best started indoors as seedlings rather than direct sowing, since it needs steady growth without setbacks.
Q: How big should heads of cauliflower be before harvest?
A: Heads of cauliflower, also called cauliflower curds, are ready to harvest when they grow to 6 to 8 inches in diameter. Some cultivars may reach 8 inches in diameter or more, but it’s best not to wait too long or the curds will loosen and lose flavor.
Q: How many days does it take cauliflower to grow?
A: Depending on the cauliflower cultivars you choose, the time to grow from seed to harvest is usually 55–100 days. Spring-planted cauliflower matures faster, while fall crops may take longer but often produce tighter, better-quality heads.
Related posts
Here are some articles you might be interested in.


.webp)