Bee Balm Plant Care: How to Grow and Care for Bee Balm in Your Garden

1. How long does it take for blackberry bushes to bear fruit?
Most blackberry bushes begin producing fruit in their second year if you are planting floricane-fruiting varieties. However, primocane-fruiting varieties can produce a small primocane crop in the first year. Expect full fruit production from established bushes after 3–4 years.
2. Can I grow blackberries from seed?
Yes, blackberries can be grown from seed, but it’s a slow and unpredictable process. Seeds require cold stratification for 2–3 months to germinate, and it may take 2–3 years before plants produce fruit. Most gardeners prefer planting seedlings or bare-root plants for faster results.
3. How do I know when blackberries are ripe?
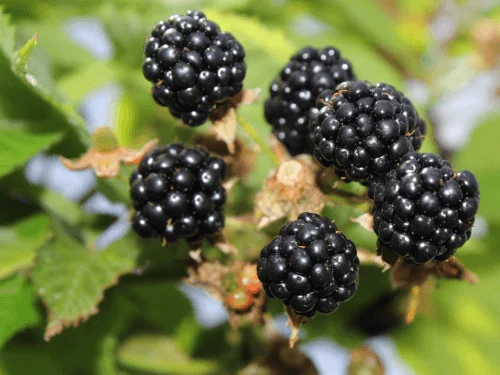
A blackberry is ripe when it is fully black, plump, glossy, and easily pulls from the cane. Taste and texture are the best indicators. Ripe berries should be harvested every couple of days during peak season for maximum flavor.
4. Can blackberries be grown in pots or raised beds?
Yes! Compact or erect blackberry varieties grow well in pots or raised beds. Use large containers with good drainage, fertile soil, and a small trellis for support. Repot every 2–3 years to maintain healthy growth.
Q: How often should I prune my herbs?
A: Most herbs benefit from trimming every 1–2 weeks during active growth. Fast growers like basil and mint can be pruned more often, while woody herbs like rosemary need lighter, less frequent trimming.
Q: Can I prune herbs if they are flowering?
A: Yes — especially annual herbs. Remove small flower buds quickly to keep the plant producing leaves. If the herb has already fully flowered and gone to seed, harvest what you can and consider replanting new seeds.
Q: Should I prune herbs in winter?
A: Only if they are actively growing indoors. Most outdoor herbs slow down in winter, so minimal pruning reduces stress. Focus on light shaping and removing dead or brown stems.
Q: What tool should I use to trim herbs?
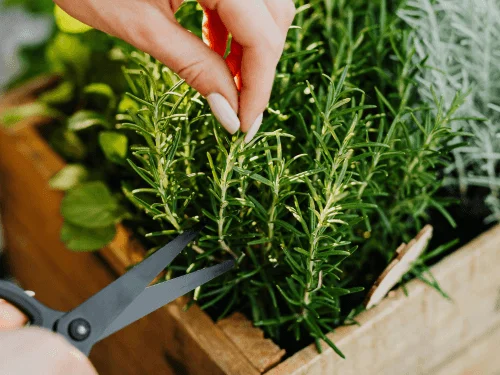
A: Use clean, sharp pruning shears or scissors. Keeping tools sanitized prevents disease transmission and helps make clean cuts that heal faster.
Q: Will pruning make my herbs grow back bigger?
A: Yes! Correct pruning encourages plants to produce more lateral shoots, resulting in bushier, healthier herbs with more stems and leaves.
1. Can windowsill plants improve indoor air quality?
Yes, several houseplants, including snake plants, pothos, and spider plants, are known for their air-purifying abilities, removing toxins such as formaldehyde and benzene from indoor air. While plants won’t replace proper ventilation, they do contribute to improved air quality and add natural humidity to dry indoor environments.
2. How can I keep my windowsill plants healthy in winter?
During winter, light intensity decreases, and indoor heating can dry the air. Place your plants on windowsills with maximum sunlight, avoid overwatering, and increase humidity using a tray of water or a small humidifier. Sensitive flowering plants like geraniums or African violets may benefit from supplemental grow lights to maintain bloom and foliage quality during shorter winter days.
3. Can I grow flowering and foliage plants together on the same windowsill?
Yes, but pay attention to their light and water requirements. Group plants with similar needs—sun-loving succulents together and shade-tolerant foliage like snake plants and pothos separately. This prevents overwatering or underexposure and ensures all plants thrive. Rotating flowering plants occasionally can also help blooms develop evenly.
Bee Balm, also known as Monarda, is a stunning and aromatic perennial plant that brings vibrant color and a delightful fragrance to gardens. With its striking flowers and ability to attract pollinators, including bees, butterflies, and hummingbirds, Bee Balm is a favorite among gardeners. However, to ensure it thrives and produces healthy blooms year after year, proper care is essential. In this article, we’ll explore essential tips for growing Bee Balm, from soil and sunlight requirements to watering techniques and pruning methods. Whether you're a seasoned gardener or a beginner, these care guidelines will help you cultivate a flourishing Bee Balm plant that enhances your garden's beauty and supports local pollinators.
What Is Bee Balm and Why Is It Great for Your Garden?

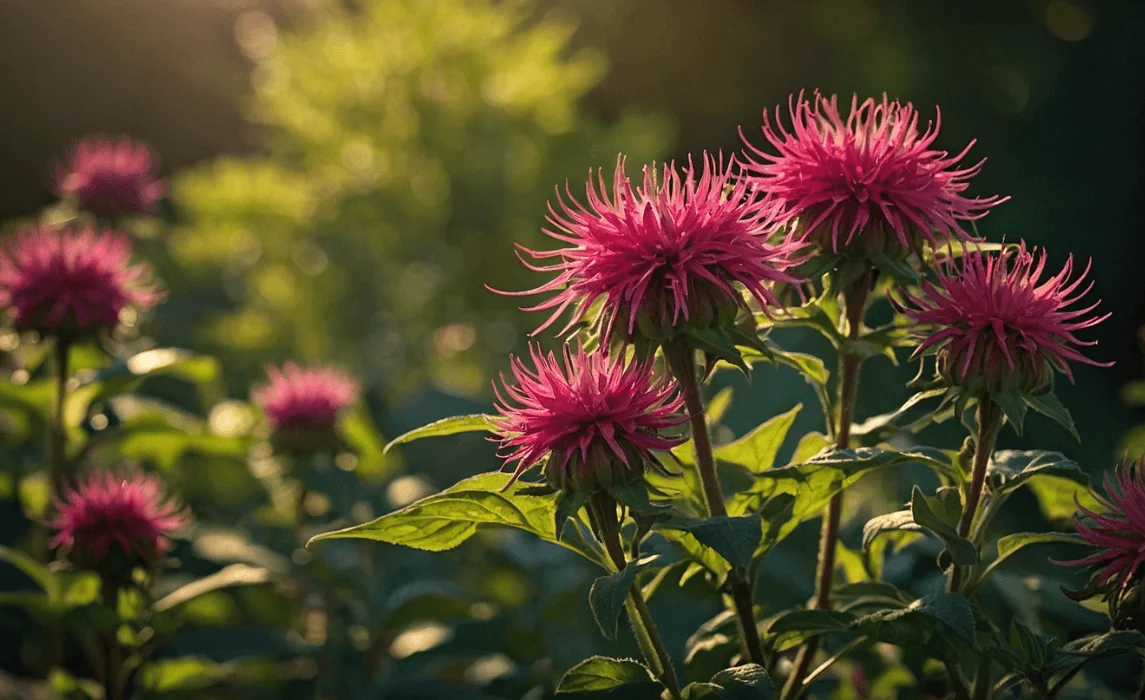
Bee balm is a native American plant known for its vibrant, tubular flowers, which can bloom in shades of red, pink, purple, and white. A member of the mint family, bee balm is easy to grow and adds color and texture to any garden. Bee balm flowers attract a variety of pollinators, including bees, hummingbirds, and butterflies, making it an excellent choice for gardeners looking to support local wildlife.
This plant is also prized for its medicinal qualities and aromatic leaves, which have been used in herbal teas for centuries. Additionally, bee balm's attractive foliage and flowers make it a popular choice for flower beds and borders. By adding bee balm to your garden, you can promote biodiversity and enjoy a colorful, fragrant garden throughout the growing season.
The Basics of Bee Balm: Quick Facts and Plant Requirements
Before diving into the specifics of growing and caring for bee balm, let's review the plant's basic characteristics:
- Plant Type: Perennial
- Size: 4 feet tall, 2–3 feet wide
- Soil Type: Well-draining, moist soil
- Soil pH: Slightly acidic to neutral (6.0–7.0)
- Bloom Time: Summer (June to August)
- Hardiness Zones: 4–9 zones.
- Native Area: North America, mostly eastern and central parts
- Toxicity Level: Safe for people and pets
Best Bee Balm Varieties for Your Garden
Bee balm comes in several varieties, each offering unique characteristics. Some of the most popular bee balm varieties include:
Monarda didyma 'Jacob Cline'

Link: https://commons.wikimedia.org/wiki/File:Monarda_didyma_Jacob_Cline_1zz.jpg
This bee balm variety is famous for its vibrant, striking red blooms that appear in mid to late summer. The flowers stand tall on strong, sturdy stems, reaching up to 4 feet in height. A standout feature of ‘Jacob Cline’ is its resistance to powdery mildew, which makes it a great choice for gardeners in humid climates. This variety thrives in a wide range of soil types and can handle both full sun and partial shade. It’s perfect for adding bold color to a garden and attracting a variety of pollinators, particularly hummingbirds and butterflies.
Monarda fistulosa (Wild Bergamot)
.webp)
Link: https://commons.wikimedia.org/wiki/File:Wild_Bergamot_(Monarda_fistulosa).jpg
Known for its delicate lavender-pink flowers, this bee balm variety grows a bit shorter than the others, usually reaching around 2 to 3 feet tall. Monarda fistulosa is an excellent choice for naturalized or wildflower gardens, as it has a more understated, yet elegant appearance. Its aromatic leaves have a slight minty fragrance, which can also add an interesting element to herb gardens. This variety does well in full sun to partial shade and is highly attractive to bees and butterflies. It’s also more tolerant of dry conditions compared to other bee balm varieties.
Monarda punctata (Spotted Bee Balm)
.webp)
Link: https://www.flickr.com/photos/pondapple/48646198441
A unique variety, Monarda punctata features distinctive yellow and purple flower clusters that stand out in any garden. The blooms are arranged in a spiky, somewhat tubular shape, creating an eye-catching effect. This variety tends to be smaller and more compact, reaching around 2 feet in height, making it ideal for smaller garden spaces or mixed perennial beds. It’s known for its tolerance to a range of soil conditions and prefers full sun but can tolerate some partial shade. Spotted bee balm attracts a variety of pollinators, including bees, butterflies, and even hummingbirds.
How to Plant Bee Balm: A Step-by-Step Guide

Planting Bee Balm from Seed
- Prepare the Seeds: Bee balm seeds need light to germinate, so sow them on the surface of seed-starting mix in trays or pots. Do not cover the seeds with soil.
- Temperature and Light: Keep the seed trays in a warm area, ideally between 65–70°F (18–21°C). Provide 14-16 hours of light per day to encourage strong growth. If necessary, use grow lights.
- Transplant Outdoors: Once the seedlings have developed multiple sets of leaves and the weather outside is consistently above 50°F, harden them off by gradually exposing them to outdoor conditions for 7–10 days. Transplant them into your garden, ensuring the soil is well-draining and enriched with compost.
Planting Bee Balm from Seedlings
- Choose the Right Spot: Bee balm plants prefer full sun but can tolerate partial shade. Select a location with well-draining, fertile soil.
- Prepare the Soil: Loosen the soil and mix in compost to improve the soil structure. Bee balm thrives in rich, moist soil but does not tolerate standing water.
- Dig Holes: Dig planting holes large enough to accommodate the root balls of your seedlings, usually 6–8 inches deep.
- Plant and Water: Place the seedling in the hole, ensuring the top of the root ball is level with the surrounding soil. Fill in the hole with soil and water thoroughly to settle the roots.
Bee Balm Care: Essential Growing Requirements

To grow bee balm successfully, it’s important to meet its soil, water, temperature, and location needs.
Watering
Bee balm thrives in moist, well-draining soil. To keep the plant healthy, water it whenever the top inch of the soil feels dry to the touch. Consistently moist soil is essential, but avoid waterlogged conditions that can lead to root rot. In general, aim to provide about 1 inch (2.5 cm) of water per week, increasing the amount during dry spells or hot weather. It’s important to water deeply, ensuring the moisture reaches the plant’s roots.
Temperature and Humidity
Bee balm grows best in moderate temperatures, between 65°F and 75°F (18–24°C). It is relatively heat-tolerant but can struggle during extreme heat. High humidity levels can benefit bee balm, but it’s important to prevent the plant from being in overly damp, stagnant areas. This is because high moisture combined with poor air circulation can increase the risk of powdery mildew. Ensure your bee balm has good air circulation to help prevent fungal diseases. If growing in a humid climate, consider spacing plants well apart to promote airflow.
Soil and Fertilization
Bee balm flourishes in soil that is rich in organic matter. Well-amended soil supports its growth by providing the necessary nutrients. If your garden soil is heavy or poor, improve it by mixing in compost, well-rotted manure, or other organic matter. For fertilization, apply a balanced fertilizer in early spring to encourage healthy growth. Bee balm does not require heavy feeding; in fact, over-fertilizing can lead to excessive foliage growth at the expense of flowers. Avoid high-nitrogen fertilizers, as they may promote leaf growth over blooms.
Sunlight and Location
For optimal blooms and healthy growth, bee balm should be planted in a location that receives at least 6 hours of direct sunlight per day. While the plant can tolerate partial shade, it tends to produce fewer flowers and may be more prone to disease in shadier spots. A sunny location not only encourages abundant flowering but also helps reduce the likelihood of fungal infections, such as powdery mildew. Ensure that your planting site is also well-drained and has enough space for the plant to spread, as bee balm can grow quite large.
Maintenance for Healthy Bee Balm Plants

Pruning
Prune bee balm plants in early spring, just before new growth begins to emerge. Start by cutting back any dead, diseased, or damaged stems to promote healthy growth. Additionally, remove any weak or spindly growth and shape the plant to encourage a fuller, bushier form. This will help the plant focus its energy on new growth and improve its overall vigor. After the plant has bloomed, deadhead spent flowers by snipping off the faded blooms. This will not only tidy up the plant but also encourage a second round of flowering and prevent the plant from self-seeding, which can lead to overcrowding.
Mulching
Apply a 2- to 3-inch layer of organic mulch, such as wood chips, shredded bark, or straw, around the base of the bee balm plant. Mulching helps retain moisture in the soil, which is particularly important during dry periods, and also aids in suppressing the growth of weeds. The mulch layer also works to maintain a stable soil temperature, keeping the roots cool in the summer and insulated during colder months. Additionally, mulching helps protect the plant's roots from extreme temperatures, ensuring they stay healthy and strong through seasonal changes.
Overwintering
In colder climates, where frost and freezing temperatures are common, it’s essential to prepare bee balm plants for winter. After the plant has finished blooming in late fall, cut the stems back to the ground. This will remove any spent foliage and allow the plant to conserve energy over the winter. Apply a layer of mulch around the base of the plant, particularly focusing on covering the roots, to provide insulation against freezing temperatures. Bee balm is hardy in USDA zones 4–9, meaning it can tolerate cold winters and will regrow in the spring once temperatures rise, giving you vibrant blooms the following season.
Bee Balm: Pest and Disease Management
Bee balm is susceptible to a few common pests and diseases, but with proper care, they can be managed effectively.
Common Pests

- Aphids: These tiny insects feed on the sap of the plant. They can be controlled by spraying the leaves with insecticidal soap or neem oil.
- Spider Mites: These pests thrive in dry conditions. If you notice webs on the leaves or a general decline in the plant's health, rinse the foliage with water or apply an insecticidal soap.
- Thrips: These small, slender insects can cause deformed flowers. Use insecticidal soap or a pyrethrin-based pesticide to control thrips.
Common Diseases

- Powdery Mildew: Bee balm is particularly susceptible to powdery mildew in damp conditions. To prevent this, avoid overhead watering and provide sufficient space between plants for airflow. If mildew appears, remove affected leaves and treat with a fungicide.
- Rust: Rust is another fungal disease that can affect bee balm. To manage rust, remove infected leaves, improve air circulation, and apply a fungicide if necessary.
Frequently Asked Questions and Answers:
Q: Can I grow bee balm in containers?
A: Yes! Bee balm can be grown in containers as long as the container has proper drainage. Choose a large container to allow for ample root growth and provide the plant with enough sunlight and water.
Q: Does bee balm need to be divided every year?
A: Bee balm can become crowded after a few years. Dividing the plants every 2-3 years will help them stay healthy and prevent overcrowding. Divide bee balm in early spring or fall.
Q: Can I use bee balm leaves for herbal tea?
A: Yes! Bee balm leaves have a minty, citrus-like flavor and can be used to make a refreshing herbal tea. They are often used in traditional remedies to relieve colds and digestive issues.


