Everything You Need to Know About Growing Spinach Indoors
Published on
February 10, 2025
Author
Zuri Khumalo
Zuri's frequent journeys to South Africa in her youth ignited her fervor for environmental science, gardening, and sustainable living. These travels deepened her connection with nature, inspiring her to contribute to conservation efforts in her own meaningful ways.
Growing Chia Plants Q&A
Can I grow chia from the chia seeds I buy at the store?
Yes. Organic chia seeds from the grocery store will often germinate, though germination can vary. Fresh seed from a garden supplier is more reliable.
How long does it take to grow chia?
Seeds sprout in about a week. The plant needs 100 to 150 days to mature before you can harvest the seeds.
Is chia a California native plant?
Salvia hispanica is native to central Mexico and Guatemala. However, Salvia columbariae, sometimes called California chia, is a California native plant.
Can I grow chia indoors?
You can grow chia sprouts and microgreens indoors easily. A full-size chia plant needs strong light and rarely sets a good seed crop indoors.
Why won't my chia flower?
Chia flowers when days get shorter. Plants in cooler regions or those lit at night may bloom late or not at all.
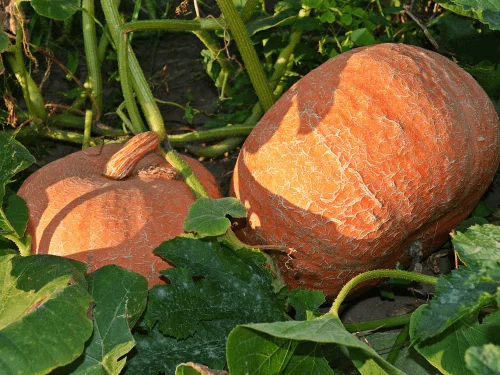
How to Grow Pumpkins Q&A
Can I grow pumpkins in a small home garden?
Yes. Choose bush or miniature varieties, grow vines on a trellis, or use raised beds. Plan on one or two plants per hill and prune vines when space is tight.
When should I plant pumpkins for Halloween?
Plant seeds in late May or early June in most climates. Count back from your first frost date and allow for 90 to 120 days of growth.
Why does my pumpkin plant have flowers but no fruit?
Male flowers appear first, so early flowers will not set fruit. If female flowers open but fail to fruit, you probably have too few bees. Pollinate by hand in the morning.
What causes pumpkin leaves to turn white?
This is usually powdery mildew. Improve airflow, water at the base, remove infected leaves, and apply a fungicide or neem oil.
Can I eat the pumpkin I grew for carving?
Yes, though carving types are stringy and bland. Pie pumpkins are sweeter, but the seeds from any pumpkin can be roasted.
Growing Grapevines Q&A
How long does it take for a grape plant to produce fruit?
Most young vines need two to three years after planting before they set a full crop, though a few clusters may appear in year two. Patience pays off — established vines can keep producing for 40 years or more.
Do I need more than one vine to grow grapes?
No. Since most grape varieties are self-fertile, one plant is enough to produce fruit on its own. Planting a second variety nearby is optional and mainly helps with cross-pollination in a few less common types.
Can grape vines grow in containers?
Yes, though grape vines grow best planted directly in the ground, where the root system has room to spread. A large container works for a year or two, but expect to transplant once the vine outgrows the pot.
Why aren't my grapes ripening?
Grapes ripen slowly compared to many fruits, and cool weather, too much shade, or overcrowded canes can all delay the process. Give the vine full sun, thin the clusters, and be patient through the growing season.
What's the difference between table grapes and wine grapes?
Table grapes are bred for fresh eating, with thinner skins and fewer seeds, while wine grapes tend to have thicker skins, more seeds, and higher sugar content suited to fermentation.
Are grape vines toxic to pets?
Grapes and grape leaves are not toxic to people, but grapes and raisins are toxic to dogs and can cause kidney damage, so keep fallen fruit cleaned up if pets have access to the vineyard.
Being all about sustainable living, I decided to give gardening a shot, and my first experiment was with spinach. Back then, as a beginner, I had my doubts about how it would turn out. But let me tell you, diving into spinach growing was a game-changer! If you're a beginner on the hunt for a green that's easy to grow, you've landed in the right spot. Stick around, and I'll walk you through everything you need to know about growing spinach indoors. It's simpler than you might imagine!
Getting Started: Choosing the Right Spinach Varieties
When it comes to growing spinach indoors, choosing the right varieties is important. As a beginner, choose varieties that are known for their adaptability and ease of growth. Some excellent choices include:
Baby Spinach
This variety is incredibly popular for its tender leaves and mild flavor. Baby spinach grows quickly and is perfect for salads, smoothies, and sandwiches. It's also well-suited for indoor cultivation due to its compact size.
Bloomsdale
Known for its crinkled leaves and rich, earthy flavor, Bloomsdale spinach is a favorite among gardeners. It's easy to grow and adapts well to indoor environments, making it an excellent choice for beginners.
Space Spinach
As the name suggests, Space spinach is ideal for small spaces and container gardening. It produces abundant foliage in a compact form, making it perfect for indoor cultivation. Plus, it has a delicious, sweet flavor that pairs well with a variety of dishes.
Tyee
Tyee spinach is a hardy variety that is resistant to bolting, making it an excellent choice for beginners. Its dark green, savoyed leaves are packed with flavor and nutrients, making it a nutritious addition to salads, soups, and stir-fries.
Melody
Melody spinach is prized for its bolt-resistant nature and sweet, mild flavor. It produces large, glossy leaves that are perfect for fresh eating or cooking. Melody spinach thrives in containers and is well-suited for indoor cultivation, making it an excellent choice for beginner gardeners.
Setting Up Your Indoor Spinach Garden
Step 1: Gather Your Supplies
Before you get started, gather all the necessary supplies:
Spinach seeds or seedlings
Containers with drainage holes (pots, trays, or window boxes)
High-quality potting mix
Compost or organic matter (optional)
Watering can or spray bottle
Grow lights (optional, if natural light is limited)
Balanced liquid fertilizer
Gardening gloves and hand trowel
Step 2: Choose the Right Container
When it comes to growing spinach in containers, remember that they have shallow roots, so you don't need anything too deep. A container that's at least 6 inches deep is perfect! Get creative with your choice of containers—plastic or ceramic pots work great, and you can even upcycle things like milk cartons or plastic bottles. Just give them a good clean and make sure they have drainage holes at the bottom to prevent waterlogging.
Step 3: Prepare the Soil
Fill the containers with a high-quality potting mix that is well-draining and nutrient-rich. This plant grows best in well-draining soil that is rich in organic matter. You can either go with a store-bought mix or whip up your own blend using peat moss, vermiculite, and perlite. Throw in some compost or worm castings for an extra nutritional boost.
Don't forget to leave a little room at the top of the container—about an inch should be enough to give room for watering.
Step 4: Plant Your Seeds or Seedlings
If planting seeds:
Sow the spinach seeds about 1/2 inch deep in the soil, spacing them evenly apart to allow room for growth. You can plant multiple seeds per container and thin them out later if necessary.
Lightly cover the seeds with soil and water gently to moisten the soil.
If using seedlings:
Carefully remove the seedlings from their nursery containers and gently loosen the roots.
Dig a small hole in the soil of your chosen container and place the seedling in the hole.
Fill in the hole with soil and press gently around the base of the seedling to secure it in place.
Water the seedlings thoroughly to help them settle into their new home.
Step 5: Provide Adequate Light
To keep your spinach plants thriving, they'll need a good dose of sunlight—about 6 hours of sunlight a day should do the trick. So, find a sunny spot near a south-facing window where they can soak up those rays. If natural sunlight is in short supply, don't sweat it! You can always rely on artificial lighting like fluorescent or LED grow lights. Just hang them about 6 inches above your plants and leave them on for 12-16 hours a day.
Step 6: Water and Fertilize Regularly
When it comes to watering, the goal is to keep the soil consistently moist without drowning it. I find that giving them a drink once a day, especially in the morning, works well. This way, the leaves have time to dry out before nightfall, which helps prevent any moisture-related issues. But hey, you don't need to stick to a strict schedule—just check the top inch of soil every now and then. If it feels dry, it's time to water. And remember, aim for the base of the plants to keep those leaves nice and dry.
As for feeding your spinach, a little fertilizer goes a long way. Every two weeks, give them a balanced fertilizer that's got equal parts nitrogen, phosphorus, and potassium. If you're into organic options, stuff like fish emulsion or kelp meal works great too. Just follow the instructions on the packaging to make sure you're giving them the right amount of nutrients without overdoing it. Easy-peasy, right?
Step 7: Monitor and Maintain
Keep an eye on your plants for signs of growth and development. Growing spinach indoors can be a fun and rewarding experience. However, it is essential to provide proper care to ensure healthy growth and a bountiful harvest. In this section, I will cover some essential spinach plant care tips.
Temperature Control:
Spinach plants prefer cooler temperatures between 50-70°F (10-21°C). It is essential to keep the plants away from direct sunlight and heat sources. If things start to warm up, a little breeze from a fan can help keep the air circulating and the temperature just right. But if it gets too chilly—below 50°F (10°C)—just tuck them in under a cloth or plastic sheet to keep them snug and protected from the cold
Pruning:
If you notice your spinach plants starting to bolt (produce flowers and seeds) prematurely, you can simply trim off those flowering stems to redirect the plant's energy back into leaf production. And while you're at it, if you spot any damaged leaves, feel free to trim those off too—it'll help keep your spinach looking its best.
Now, if you find your spinach seedlings are a bit too cozy together and things are getting crowded, it's time for a little thinning out. But no need to yank those extra seedlings out and risk disturbing the roots of their neighbors. Just grab your trusty scissors and snip off the excess seedlings right at soil level. It's a gentle way to give the remaining plants a bit more breathing room to stretch out and grow.
Disease and Pest Management:
Diseases:
Powdery Mildew:
Symptoms: White, powdery spots or patches on the leaves.
Prevention and Treatment: Improve air circulation around your plants by spacing them properly and avoiding overcrowding. Water the soil directly and avoid overhead watering to keep the foliage dry. If powdery mildew appears, remove and destroy affected leaves, and treat with a fungicidal spray labeled for powdery mildew.
Downy Mildew:
Symptoms: Yellow or brown spots on the upper surface of leaves, with a fuzzy gray or purple growth on the underside.
Prevention and Treatment: Provide adequate air circulation by spacing plants properly and avoiding overcrowding. Remove and destroy affected leaves, and treat with a copper-based fungicide if necessary.
Fusarium Wilt:
Symptoms: Yellowing and wilting of leaves, followed by stunted growth and eventual plant death.
Prevention and Treatment: Plant disease-resistant spinach varieties when possible. Avoid overwatering and waterlogged soil, as Fusarium wilt thrives in damp conditions.
Pests:
Aphids:
Symptoms: Clusters of tiny, soft-bodied insects on the undersides of leaves, causing leaves to curl or distort.
Prevention and Treatment: Use a strong jet of water to dislodge aphids from plants, or wipe them off with a damp cloth. If necessary, treat with insecticidal soap or neem oil.
Spider Mites:
Symptoms: Fine webbing on the undersides of leaves, yellow or stippled foliage, and tiny, moving dots on the leaves.
Prevention and Treatment: Increase humidity around plants by misting them regularly or placing a humidifier nearby. Prune and remove heavily infested leaves, and treat with insecticidal soap or neem oil.
Leaf Miners:
Symptoms: Serpentine tunnels or trails on the leaves, caused by the larvae of small flies.
Prevention and Treatment: Remove and destroy affected leaves to prevent further spread of leaf miner larvae. If necessary, treat with insecticidal soap or neem oil.
General Tips for Disease and Pest Management:
Practice good sanitation by removing and disposing of plant debris, fallen leaves, and weeds regularly to reduce the risk of disease and pest infestations.
Monitor your spinach plants regularly for signs of disease or pest damage, and take action promptly to prevent further spread.
Use organic and environmentally friendly methods whenever possible to control pests and diseases, minimizing the use of chemical pesticides and fungicides.
Step 8: Harvesting and Storage
Harvesting
When it comes to harvesting spinach, timing is key. You want to pick the leaves when they are at their peak, before they start to wilt or turn yellow. You can start harvesting spinach as soon as the leaves are big enough to eat, which is usually around 4-6 weeks after planting spinach indoors.
To harvest, simply use a pair of scissors or garden shears to cut the leaves off at the base of the stem. You can either harvest the entire plant at once or just pick a few leaves at a time. If you choose to harvest the entire plant, be sure to cut it off at ground level.
It's important to note that spinach is a cool-season crop, which means it doesn't do well in hot weather. If you notice that your spinach is starting to bolt (produce flowers), it's time to harvest it before the leaves become bitter
Storage Solutions
Once you've harvested your spinach, it's important to store it properly to keep it fresh for as long as possible. Here are some storage solutions to consider:
Rinse the leaves in cold water and pat them dry with a paper towel.
Store the leaves in a plastic bag or container with a damp paper towel to keep them moist.
Alternatively, you can freeze your spinach for later use. Simply blanch the leaves in boiling water for 2-3 minutes, then plunge them into ice water to stop the cooking process. Drain the leaves and freeze them in an airtight container or freezer bag.
Step 9: Enjoy Your Homegrown Greens!
Congratulations, you've successfully planted spinach indoors and now have a bountiful supply of fresh, nutritious greens at your fingertips. Throw your homegrown spinach into salads, smoothies, sandwiches, soups, or stir-fries for an easy and healthy boost to any meal.
Benefits of Growing Spinach Indoors
Growing spinach indoors has numerous benefits that make it a worthwhile endeavor for any home gardener. Here are some of the benefits of growing spinach indoors:
1. Year-Round Availability
It allows you to have fresh spinach all year round, regardless of the season. This is especially useful for those who live in areas with harsh winters or hot summers, where outdoor gardening may be difficult or impossible.
2. Control Over Growing Conditions
You have complete control over the growing conditions, including temperature, humidity, and lighting. This allows you to create the ideal environment for your spinach to thrive, resulting in healthier and more flavorful plants.
3. Space-Saving
Indoor gardening is a great option for those who have limited outdoor space. With a small indoor garden, you can grow a significant amount of spinach without taking up valuable outdoor real estate.
4. Health Benefits
Spinach is a highly nutritious vegetable that is packed with vitamins, minerals, and antioxidants. By growing spinach inside, you can ensure that it is free from harmful pesticides and other chemicals, making them even healthier for you and your family.
FAQs
Q: Can I reuse the soil from my indoor spinach containers for future plantings?
A: While you can technically reuse soil from your indoor spinach containers for future plantings, it's essential to refresh and replenish the soil to ensure optimal plant growth. Remove any remaining roots or debris from the soil, and amend it with fresh compost or potting mix to replenish nutrients. Additionally, consider rotating your crops or practicing crop rotation to minimize soil depletion and reduce the risk of disease buildup.
Q: Are there any companion plants that pair well with indoor-grown spinach?
A: Yes, several companion plants pair well with indoor-grown spinach and can help promote healthy growth while deterring pests. Some examples include lettuce, radishes, carrots, and herbs like basil and dill. These companion plants can provide shade, attract beneficial insects, and enhance the overall diversity and productivity of your indoor garden.
Q: Can I harvest multiple times from the same plant?
A: Yes, you can harvest multiple times from the same plant by picking the outer leaves as they mature while allowing the inner leaves to continue growing. This method, known as "cut-and-come-again," allows you to enjoy a continuous harvest of fresh spinach leaves over an extended period.