Your Guide to Growing Herbs in Pots: Tips and Tricks for Success
Published on
February 4, 2025
Author
Anjali Sharma
Anjali was born and raised in Indi and is now residing in New Jersey with her husband. Anjali's passion lies in raising her own vegetables and herbs, which she wants to share with others.
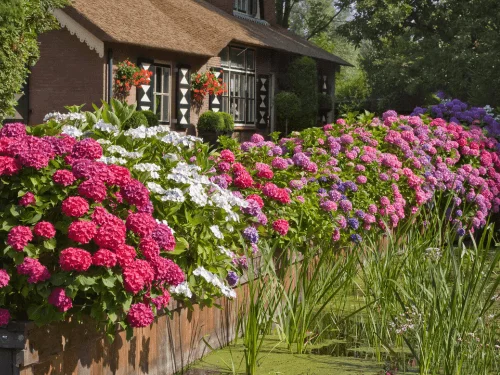
English Garden Q&A
How can I implement English garden ideas if I only have a very small space or a compact front garden?
Focus heavily on vertical layering using climbing roses or honeysuckle, and use a soft pastel color palette to add an illusion of depth. Gathering multi-sized planters along walkways also provides an overflowing, lush look within a restricted footprint.
What are the best strategies to ensure my English border retains visual interest during the winter months?
Incorporate structural evergreens like boxwood hedges, pruned topiary, or permanent hardscape anchors like a stone sundial. Avoid clear-cutting in autumn; leaving dried seed heads and tall foxglove stalks intact through winter captures striking structural shapes and textures.
Can I achieve an authentic cottage style look if my yard does not receive direct sun all day?
Yes. While roses need direct sun, classic woodland edge plants like the foxglove thrive beautifully in partial shade and dappled light. Pair these with shade-tolerant foliage and soft ground cover to capture a romantic, layered look.
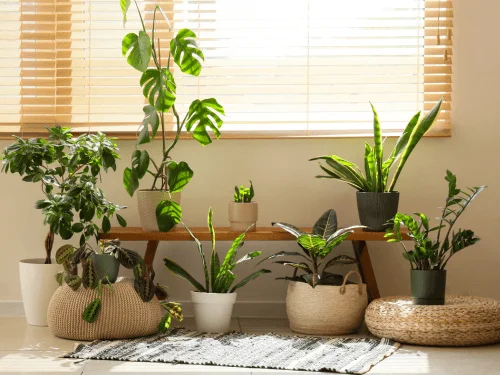
Easy Houseplants Q&A
Why is there a white, crusty buildup on the surface of my plant's soil?
This is a very common issue for indoor house plants. Usually, it is a buildup of soluble salts and minerals from tap water or fertilizer. If it looks soft and fuzzy rather than hard and crystalline, it might be a harmless saprophytic fungus breaking down organic matter in the soil. To fix mineral crusts, scrape off the top layer of soil and occasionally "flush" the pot by pouring distilled water through it until it runs out the bottom freely.
Do easy houseplants need fertilizer to survive?
They will survive without it, but they won't thrive. In nature, plants get a constant supply of nutrients. In a pot, they eventually deplete the soil. Using a standard houseplant fertilizer at half-strength during the spring and summer will encourage stronger roots and larger leaves. Do not fertilize in winter when the plants are dormant.
How do I know if my plant is getting the right amount of light?
If a plant is getting too much direct light, its leaves will look bleached, washed out, or develop crispy, scorched brown patches. If it isn't getting enough light, the growth will be "leggy" (long stems with large gaps between leaves), variegated plants will lose their patterns and turn solid green, and the soil will take weeks to dry out, increasing the risk of root rot.
Rooftop Garden Design And Roof Garden Ideas For Your Terrace
What is the most important step before transforming your rooftop into a garden?
The most critical step is hiring a structural engineer to assess the load-bearing capacity of your roof surface. Soil, water, and containers are incredibly heavy, and ignoring weight restrictions can lead to catastrophic structural damage. Additionally, you must verify all local laws to ensure compliance.
How do I manage regular watering during hot weather and dry spells?
Because the sun and wind dry out elevated pots rapidly, hand-watering becomes exhausting. The best solution is to install a drip irrigation system with automated irrigation lines to ensure consistent moisture. Using a self-watering pot or adding vermiculite and coir to your soil mix will also help retain water during a dry spell.
What kind of soil mix should I use for growing plants in containers on a roof terrace?
Never use standard garden dirt, as it is too heavy and compacts easily. Instead, use a lightweight potting soil that includes a balanced mix of loam for structure, coir for moisture retention, and vermiculite for aeration. Enrich this base with organic compost and worm castings to provide nutrients.
I've always loved the flavors and aromas of fresh herbs. Growing my own has become a passion of mine–it's surprisingly easy and incredibly rewarding! Let me show you how to create your own fragrant and delicious herb garden, even if you're a beginner.
Advantages of Growing Herbs in Pots
Fresh herbs add a burst of flavor and fragrance to any dish. Growing your own in pots lets you enjoy those delicious aromas anytime! Here are some of the amazing benefits of a potted herb garden, plus tips to help you thrive:
Portability: Container-grown herbs can be easily repositioned to maximize sunlight exposure, protect them from harsh weather conditions, or simply update your outdoor or indoor decor. Wheeled plant stands provide extra ease for moving your herbs around as needed.
Space-saving: Growing herbs in containers is ideal for those with balconies, windowsills, or limited garden space. Utilize stacking pots, hanging baskets, or repurpose vertical structures like ladders to maximize your growing area.
Pest and Disease Control: Containers offer a more controlled environment, reducing the risk of widespread pest infestations or soil-borne diseases compared to in-ground gardening. Regular inspection of your herbs remains important for early detection and treatment of potential problems.
Flexibility: Containers allow you to experiment with a wider variety of herbs within a smaller area. Consider grouping herbs with similar growth requirements for optimal success.
Freshness and Flavor: Harvesting herbs directly from your container garden ensures unparalleled freshness and superior flavor compared to store-bought options. Planting herbs commonly used together in a single container streamlines the harvesting process.
Cost-Effective: Growing your own herbs is a budget-friendly alternative to purchasing small quantities from the store. Many herbs can be easily propagated from seed, offering additional cost savings.
Therapeutic: Tending to a container herb garden can provide a sense of relaxation and connection with nature.
Steps for Growing Herbs in Pots
Growing herbs in pots requires a few key considerations. Follow these essential steps to create your own thriving herb garden:
1. Choosing the Right Containers
Drainage is essential: Your pots MUST have holes at the bottom to allow excess water to escape. Soggy roots are a recipe for disaster.
Size matters: Finding the right-sized pot is crucial for healthy herbs. Too small, and your plant's roots will become cramped, hindering growth. Too large, and the excess soil holds too much moisture, potentially leading to root rot. For most herbs, a 6-8 inch pot is a decent starting point for individual plants. Larger 12-18 inch containers can accommodate several herbs comfortably, as long as they have compatible needs.
Material options:
Terracotta: Classic choice! Dries out quickly, which is perfect for herbs that dislike soggy soil (like rosemary or lavender).
Plastic: Retains moisture well, a good option for thirsty herbs such as mint. Plus, it's affordable and comes in endless colors!
Self-watering pots: Take the guesswork out of watering, especially great for beginners or if you tend to forget.
Other Options: Get creative!
Glazed ceramic: Offers some moisture retention with a stylish look.
Metal: Can be sleek, but make sure it has proper drainage holes.
Wood: Rustic charm, but use a liner to protect the wood from rot.
2. Picking the Right Herbs
Know Your Climate Zone: Understanding your local climate is key. Research your hardiness zone to determine which herbs will thrive year-round or seasonally in your area.
Hot Climates: Mediterranean herbs like rosemary, oregano, thyme, sage, and lavender love the heat and tolerate dry conditions.
Cooler Climates: Chives, mint (in contained pots!), parsley, cilantro, and tarragon do well with cooler temperatures.
Tropical Climates: Basil, lemongrass, Vietnamese coriander, and certain types of mint flourish in heat and humidity.
Available Sunlight:
Full Sun Lovers (6+ hours of direct sun): Many popular culinary herbs fall into this category, including:
Basil
Rosemary
Thyme
Oregano
Sage
Lavender
Partial Shade Stars: For those shadier spots, try these herbs:
Mint
Parsley
Cilantro
Chives
Lemon Balm
Important Note: While these are good starting points, always research the specific sun requirements of any herb you're considering. Some varieties within these groups might crave a little less sunshine or be able to handle a bit more shade.
3. Preparing for Planting
Soil choice: Use a well-draining potting mix specifically designed for containers. Here's a simple recipe you can try:
Potting soil: Start with a high-quality potting soil as the base. This provides the necessary structure and nutrients for your herbs. Look for a mix labeled for indoor or container gardening, as these usually have good drainage properties.
Perlite or Vermiculite: Add perlite or vermiculite to the potting soil to improve drainage. These materials help prevent the soil from becoming compacted, allowing air and water to move freely through the mix.
Compost: Incorporate compost into the mix to provide additional nutrients for your herbs. Compost also helps improve soil structure and water retention.
Sand: Some gardeners also add coarse sand to their potting mix to further enhance drainage. However, be cautious with the amount of sand you add, as too much can make the mix too gritty.
Optional: Peat moss or Coconut coir: Peat moss or coconut coir can be added to help retain moisture in the soil. They also improve soil structure and aeration.
4. Planting Your Herbs
Planting depth: Plant at the same depth as the seedling container, or as indicated on the seed packet.
Caring for Your Herb Garden
Having a potted herb garden brings joy and deliciousness, but consistent care ensures your plants thrive. Here's a breakdown of the key elements to keep your herbs happy and healthy:
Watering:
Check the soil: The best way to know if it's time is to stick your finger an inch into the soil. If it feels dry, it's watering time!
Water deeply: Water thoroughly until excess drains from the pot's bottom, then let the top layer of soil dry out slightly before the next watering.
Water the roots, not the leaves: This helps prevent fungal diseases. Morning watering is best.
Practical Tip Terracotta pots dry out faster than plastic – adjust watering frequency accordingly.
Fertilizer:
Feed lightly: Most herbs don't need heavy fertilizing. A diluted liquid fertilizer every few weeks during the active growing season is usually sufficient.
Organic options: Compost tea or fish emulsion are excellent choices for herbs.
Practical Tip: Herbs grown for their leaves (basil, mint) benefit from slightly more fertilizer than those grown for seeds or flowers (coriander, rosemary).
Temperature:
Most herbs like it warm: They prefer daytime temperatures between 65-85°F (18-29°C).
Protect from extremes: Avoid frost, and bring pots indoors if extreme heat is predicted.
Practical Tip: If you live in a very hot climate, provide some afternoon shade for your herbs during the hottest part of the day.
Pest and Diseases:
Regular inspection: Make a habit of closely examining your herbs often. Early detection is key to keeping them healthy! Here's what to watch for:
Pests:
Aphids: These sap-suckers weaken plants, causing stunted growth, yellowing or deformed leaves, and can transmit plant viruses.
Spider mites: Damage plants by piercing leaves and sucking out the contents, leading to stippling, discoloration, and possible leaf drop.
Whiteflies: Sap feeders that weaken plants and can also spread viruses. Their sticky excretions (honeydew) promote sooty mold growth.
Mealybugs: Weaken plants through sap-sucking and can cause stunted growth. They also leave behind unsightly cottony masses.
Diseases:
Powdery mildew: Interferes with photosynthesis, stunts growth, and makes plants more susceptible to other problems.
Rust: Impairs plant health by reducing photosynthetic capacity, causing leaf distortion and premature leaf drop.
Leaf spots: Depending on the cause, can lead to holes in leaves, leaf drop, and reduced plant vigor.
Yellowing leaves: While a general sign of several issues, it often indicates nutrient deficiencies or root rot, hindering healthy plant growth.
Act quickly:
Early intervention is key! The sooner you deal with pests or diseases in your herb garden, the better your chances of saving your plants. There are lots of easy and organic ways to tackle these problems. Try blasting pests like aphids or spider mites away with a strong spray of water – be sure to do this regularly. You can also mix up a gentle soapy solution with a few drops of dish soap, which works wonders on soft-bodied bugs. For a natural approach, consider introducing beneficial insects like ladybugs, which love to snack on aphids. No matter which method you choose, always test it on a tiny part of your herb first, just to be sure it doesn't cause any harm.
Things to Avoid
A few simple missteps can derail your potted herb garden. Below are ideas on how to sidestep the most frequent problems to keep your herbs thriving:
Overwatering:
The #1 reason for herb failure: Overwatering leads to root rot and other problems. Remember, it's easier to revive a slightly dry plant than an overwatered one!
Drainage is key: Ensure your pots have drainage holes to prevent waterlogging.
Practical Tip: If you tend to overwater, choose terracotta pots that dry out faster, or mix in some perlite to your potting soil for improved drainage.
Undersized Pots:
Restricts growth: Cramped roots lead to stunted plants and decreased harvest.
Repot as needed: As your herbs grow, move them into progressively larger pots to provide adequate space.
Practical Tip: Group herbs with similar growth rates in a large container, making sure to provide enough spacing between individual plants.
Frequently Asked Questions (FAQs)
Q: I'm new to gardening. What are the easiest herbs to grow in containers?
A: Basil, chives, mint, oregano, parsley, and thyme are fantastic starter herbs. They're relatively forgiving and offer delicious rewards.
Q: Can I grow multiple types of herbs in one container?
A: Yes! Choose herbs with similar sunlight and water needs ("herbs with similar cultural requirements"). Herbs like oregano, rosemary, and thyme work well together.
Q: My herbs don't seem to be thriving. What am I doing wrong?
A: The most common culprits are overwatering (check for root rot), insufficient sunlight (herbs need at least 6 hours), or using the wrong potting mix (use specific container mix, not garden soil).
Q: I have a small space (patio or balcony). What's the best way to grow herbs in containers?
A: Choose compact herb varieties, use pots of various sizes (small pots, clay pots), and maximize vertical space with hanging baskets or tiered planters. Mediterranean herbs like rosemary and lavender do particularly well in sunny, limited-space situations.