Growing Sweet Potato Slips: A Beginner's Guide to Starting Your Own Crop
Published on
February 12, 2025
Author
Ryan Johnson
Ryan Johnson relocated to his grandfather's old farm when he was 22 years old where he discovered the joys of farming and gardening. With his cool demeanor and strong-willed passion for the agrarian lifestyle, he now shares his know-how to aspiring gardeners.
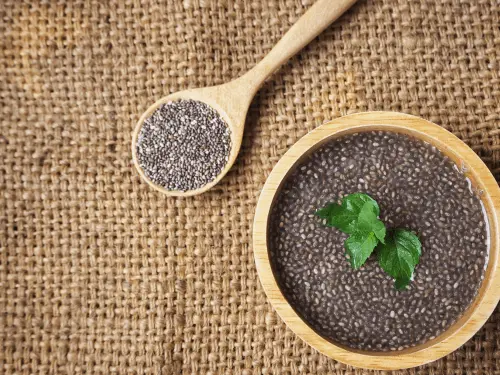
Growing Chia Plants Q&A
Can I grow chia from the chia seeds I buy at the store?
Yes. Organic chia seeds from the grocery store will often germinate, though germination can vary. Fresh seed from a garden supplier is more reliable.
How long does it take to grow chia?
Seeds sprout in about a week. The plant needs 100 to 150 days to mature before you can harvest the seeds.
Is chia a California native plant?
Salvia hispanica is native to central Mexico and Guatemala. However, Salvia columbariae, sometimes called California chia, is a California native plant.
Can I grow chia indoors?
You can grow chia sprouts and microgreens indoors easily. A full-size chia plant needs strong light and rarely sets a good seed crop indoors.
Why won't my chia flower?
Chia flowers when days get shorter. Plants in cooler regions or those lit at night may bloom late or not at all.
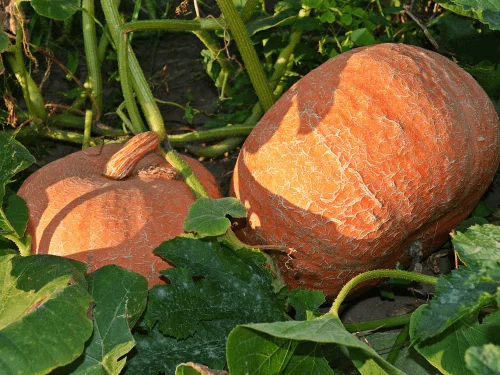
How to Grow Pumpkins Q&A
Can I grow pumpkins in a small home garden?
Yes. Choose bush or miniature varieties, grow vines on a trellis, or use raised beds. Plan on one or two plants per hill and prune vines when space is tight.
When should I plant pumpkins for Halloween?
Plant seeds in late May or early June in most climates. Count back from your first frost date and allow for 90 to 120 days of growth.
Why does my pumpkin plant have flowers but no fruit?
Male flowers appear first, so early flowers will not set fruit. If female flowers open but fail to fruit, you probably have too few bees. Pollinate by hand in the morning.
What causes pumpkin leaves to turn white?
This is usually powdery mildew. Improve airflow, water at the base, remove infected leaves, and apply a fungicide or neem oil.
Can I eat the pumpkin I grew for carving?
Yes, though carving types are stringy and bland. Pie pumpkins are sweeter, but the seeds from any pumpkin can be roasted.
Growing Grapevines Q&A
How long does it take for a grape plant to produce fruit?
Most young vines need two to three years after planting before they set a full crop, though a few clusters may appear in year two. Patience pays off — established vines can keep producing for 40 years or more.
Do I need more than one vine to grow grapes?
No. Since most grape varieties are self-fertile, one plant is enough to produce fruit on its own. Planting a second variety nearby is optional and mainly helps with cross-pollination in a few less common types.
Can grape vines grow in containers?
Yes, though grape vines grow best planted directly in the ground, where the root system has room to spread. A large container works for a year or two, but expect to transplant once the vine outgrows the pot.
Why aren't my grapes ripening?
Grapes ripen slowly compared to many fruits, and cool weather, too much shade, or overcrowded canes can all delay the process. Give the vine full sun, thin the clusters, and be patient through the growing season.
What's the difference between table grapes and wine grapes?
Table grapes are bred for fresh eating, with thinner skins and fewer seeds, while wine grapes tend to have thicker skins, more seeds, and higher sugar content suited to fermentation.
Are grape vines toxic to pets?
Grapes and grape leaves are not toxic to people, but grapes and raisins are toxic to dogs and can cause kidney damage, so keep fallen fruit cleaned up if pets have access to the vineyard.
Growing sweet potato slips is a rewarding gardening activity that ensures a bountiful harvest of this versatile and nutritious root vegetable. Slips are the shoots that grow from a mature sweet potato and are used to propagate new plants. There are various methods to growing sweet potato slips, and this guide will walk you through each method in detail.
I recall my first attempt at growing sweet potato slips. It was a hot summer, and I was eager to see if I could nurture them successfully. I tried different methods, like suspending sweet potatoes in jars of water and planting them directly in soil. Each method taught me something new about patience and resilience.
In this article, we will cover the water method, the outdoor soil method, and the indoor soil method, providing step-by-step instructions for each.
When to Start
Timing is crucial when growing sweet potato slips. Sweet potatoes thrive in warm weather and need a long growing season, typically around 90 to 170 days, depending on the variety. It's essential to start the slip-growing process 8-12 weeks before the last expected frost date in your area. This will ensure that your slips are ready for planting when the weather is warm enough for sweet potatoes to grow.
Materials Needed
Before starting the process, gather the following materials:
Mature sweet potatoes (preferably organic and untreated)
These serve as the source for your sweet potato slips. The mature sweet potatoes will sprout shoots or "slips" that can be propagated to grow new sweet potato plants.
Clean water (for water method)
Water is essential for encouraging the development of sweet potato slips. It provides hydration and promotes the growth of roots and shoots.
Glass jars or cups (for water method)
These are used to suspend the sweet potatoes partially submerged in water. Glass containers are preferred as they are inert and won't react with the water or sweet potatoes.
Toothpicks (for water method)
Toothpicks are used to hold the sweet potatoes in place on the rim of the jars or cups. They allow the sweet potatoes to be suspended in water without being fully submerged.
Potting soil (for indoor and outdoor soil methods)
Potting soil is used when transplanting the rooted sweet potato slips into individual pots or containers. It provides the necessary nutrients and support for the slips as they continue to grow.
Shallow containers or trays (for water and indoor soil methods)
These are used to hold the sweet potato slips while they develop roots in water or potting soil. They provide a stable base for the slips and help contain any mess or water runoff.
Garden soil or raised beds (for outdoor soil method)
If you choose to grow sweet potato slips directly in the soil outdoors, you'll need garden soil or a prepared raised bed. This soil should be loose, well-draining, and fertile to support healthy growth.
Grow lights (for indoor soil method)
If you're growing sweet potato slips indoors using the soil method, grow lights may be necessary to provide adequate light for proper growth. Sweet potatoes require plenty of sunlight, and grow lights can supplement natural light, especially if you don't have access to a sunny window.
Spray bottle (for indoor soil method)
A spray bottle is useful for misting the soil and foliage of indoor sweet potato slips. It helps maintain proper humidity levels and prevents the soil from drying out too quickly.
Labels or markers (optional, for all methods)
Labels or markers can be used to identify different varieties of sweet potatoes or to keep track of planting dates and other important information. They help with organization and ensure you know what you're growing and when.
Methods for Growing Sweet Potato Slips
1. Water Method
The water method is a popular and straightforward way to grow sweet potato slips in water. Here's how to do it:
Select Sweet Potatoes: Choose healthy, mature sweet potatoes. Organic sweet potatoes are ideal because they are less likely to be treated with sprout inhibitors.
Prepare the Potatoes: Wash the sweet potatoes thoroughly to remove any dirt. Cut the sweet potatoes in half if they are large.
Insert Toothpicks: Insert three to four toothpicks around the middle of each sweet potato half. The toothpicks will act as supports to suspend the sweet potato in water.
Suspend in Water: Fill glass jars or cups with clean water. Place each sweet potato half into a jar, with the pointed end facing down and the toothpicks resting on the rim of the jar, suspending the bottom half of the sweet potato in the water.
Location: Place the jars in a warm, sunny location, such as a windowsill. Sweet potatoes need warmth and light to sprout.
Water Maintenance: Change the water every few days to prevent mold and bacteria growth. Ensure the sweet potatoes remain partially submerged.
Wait for Slips to Grow: In a few weeks, shoots (slips) will begin to grow from the top of the sweet potato. These slips will have leaves and roots.
Harvest the Slips: When the slips are 6-12 inches long, carefully twist or cut them off the sweet potato. Remove the lower leaves and place the slips in water to develop roots if they haven't already.
Prepare for Planting: Once the slips have developed roots, they are ready to be planted in the garden or containers.
2. Outdoor Soil Method
The outdoor soil method involves planting the sweet potatoes directly in the soil to encourage slip growth. This method is suitable for gardeners with access to garden space or raised beds. Here's how to do it:
Prepare the Garden Bed: Choose a sunny location with well-draining soil. Sweet potatoes prefer loose, sandy soil. Amend the soil with compost or organic matter to improve fertility and drainage.
Plant the Sweet Potatoes: Bury the sweet potatoes horizontally about 2 inches deep in the prepared garden bed. Space the potatoes about 12-18 inches apart to allow room for slip growth.
Water Regularly: Keep the soil consistently moist but not waterlogged. Sweet potatoes need regular watering to encourage sprouting.
Mulch the Bed: Apply a layer of mulch around the sweet potatoes to retain moisture and suppress weeds.
Wait for Slips to Grow: In a few weeks, slips will begin to emerge from the buried sweet potatoes.
Harvest the Slips: When the slips are 6-12 inches long, carefully cut or pull them off the sweet potato. Ensure each slip has roots before transplanting.
Prepare for Planting: The slips are now ready to be planted in their final growing location. If the slips don't have roots, place them in water until roots develop.
3. Indoor Soil Method
The indoor soil method is ideal for gardeners who want to start slips indoors before the outdoor planting season. This method allows for better control over growing conditions. Here's how to do it:
Prepare Containers: Fill shallow containers or trays with potting soil. Ensure the containers have drainage holes to prevent waterlogging.
Plant the Sweet Potatoes: Bury the sweet potatoes horizontally about 2 inches deep in the potting soil. Space the potatoes about 6 inches apart.
Water Lightly: Water the soil lightly to keep it moist but not soggy. Use a spray bottle to avoid overwatering.
Provide Warmth and Light: Place the containers in a warm location, ideally between 70-80°F (21-27°C). Use grow lights to provide 12-14 hours of light per day if natural sunlight is insufficient.
Maintain Moisture: Keep the soil consistently moist by watering as needed. Use a spray bottle to maintain humidity around the plants.
Wait for Slips to Grow: In a few weeks, slips will start to grow from the sweet potatoes.
Harvest the Slips: When the slips are 6-12 inches long, carefully twist or cut them off the sweet potato. Remove the lower leaves and place the slips in water to develop roots if necessary.
Prepare for Planting: Once the slips have developed roots, they are ready to be transplanted to their final growing location.
Harvesting Sweet Potatoes
Sweet potatoes are typically ready for harvest 90-170 days after planting, depending on the variety. Here are the steps for harvesting sweet potatoes:
Check for Maturity: The foliage of sweet potatoes will start to yellow and die back when the tubers are mature. This is a sign that the sweet potatoes are ready to be harvested.
Dig Carefully: Use a garden fork or trowel to carefully dig around the plants, starting about 12 inches away from the base to avoid damaging the tubers. Lift the sweet potatoes out of the soil gently.
Cure the Sweet Potatoes: After harvesting, sweet potatoes need to be cured to improve their flavor and storage life. Place the sweet potatoes in a warm, humid location (85°F or 29°C and 85-90% humidity) for about 10 days.
Store the Sweet Potatoes: After curing, store the sweet potatoes in a cool, dry place (55-60°F or 13-16°C) with good ventilation. Properly cured and stored sweet potatoes can last for several months.
Frequently Asked Questions and Answers:
Q: How long does it take for sweet potato slips to grow?
A: It typically takes 4-6 weeks for slips to grow from a mature sweet potato. The exact time can vary depending on the method used and the growing conditions.
Q: Can I grow sweet potato slips from store-bought sweet potatoes?
A: Yes, you can grow slips from store-bought sweet potatoes, but it's best to use organic sweet potatoes. Non-organic sweet potatoes may be treated with sprout inhibitors, which can hinder slip growth.
Q: How many slips can I get from one sweet potato?
A: One sweet potato can produce multiple slips. On average, you can expect to get 10-15 slips from a single sweet potato.
Q: Can sweet potato slips be grown indoors?
A: Yes, sweet potato slips can be started indoors using the indoor soil method. This allows for better control over growing conditions and ensures the slips are ready for planting when the weather is suitable.
Q: Can I reuse the sweet potato after harvesting the slips?
A: Yes, you can continue to use the same sweet potato to produce more slips as long as it remains healthy. Rotate the sweet potato to expose different parts to the growing conditions.